How to Add Products to Shopify: Your Ultimate Step-by-Step Guide
For any aspiring or established e-commerce entrepreneur, the journey to online success on Shopify begins with one crucial step: adding products. It's more than just listing items; it's about creating a compelling digital storefront that captivates customers and drives sales. With over 1.7 million active stores worldwide, Shopify is a powerhouse, offering a user-friendly interface and robust features. But how do you effectively leverage this platform to showcase your products?
This comprehensive guide will walk you through every method of adding products to your Shopify store, from manual entry to efficient bulk imports and powerful app integrations. We'll also dive into critical optimization strategies to ensure your product listings not only appear but also convert. By the end of this post, you'll have the knowledge to confidently populate your Shopify store, making it a magnet for your target audience.
Before You Begin: Essential Product Preparations
Before you even think about clicking "Add product," a little preparation goes a long way in streamlining the process and enhancing your store's professionalism.
- Craft Compelling Product Descriptions: Don't just list features; tell a story. Focus on benefits, use sensory words, and include social proof. As highlighted in our context, "Don't merely copy and paste product data from other websites; this will hurt your chances of ranking well in Google searches."
- Arrange for High-Quality Product Photos: Visuals are paramount in e-commerce. Whether you're honing your smartphone photography skills or hiring a professional, ensure your images are high-resolution, clear, and showcase your product from multiple angles.
- Optimize Product Image Sizes: Adhere to Shopify's guidelines for image optimization. This improves your store's loading speed and overall professional appearance.
10 Steps to Manually Add Products to Shopify
Manually adding products is the most common starting point for new Shopify store owners. It offers granular control over each listing.
Step 1: Accessing Your Shopify Admin
Log in to your Shopify admin dashboard. From the left-hand menu, navigate to Products > Add product.
Step 2: Inputting Product Details
This is where you define your product.
-
Product Title: Keep it brief, memorable, and consistent across your store. For example, "Moonstone - Earring Collection." Consistency in naming conventions, such as starting with the product's color, is crucial.
-
Description: This is your opportunity to engage and persuade. Prioritize buyer benefits, use a rich text editor to emphasize key information, and avoid simply listing features. "This is your opportunity to grab their interest and persuade them that they need to buy whatever you're offering."
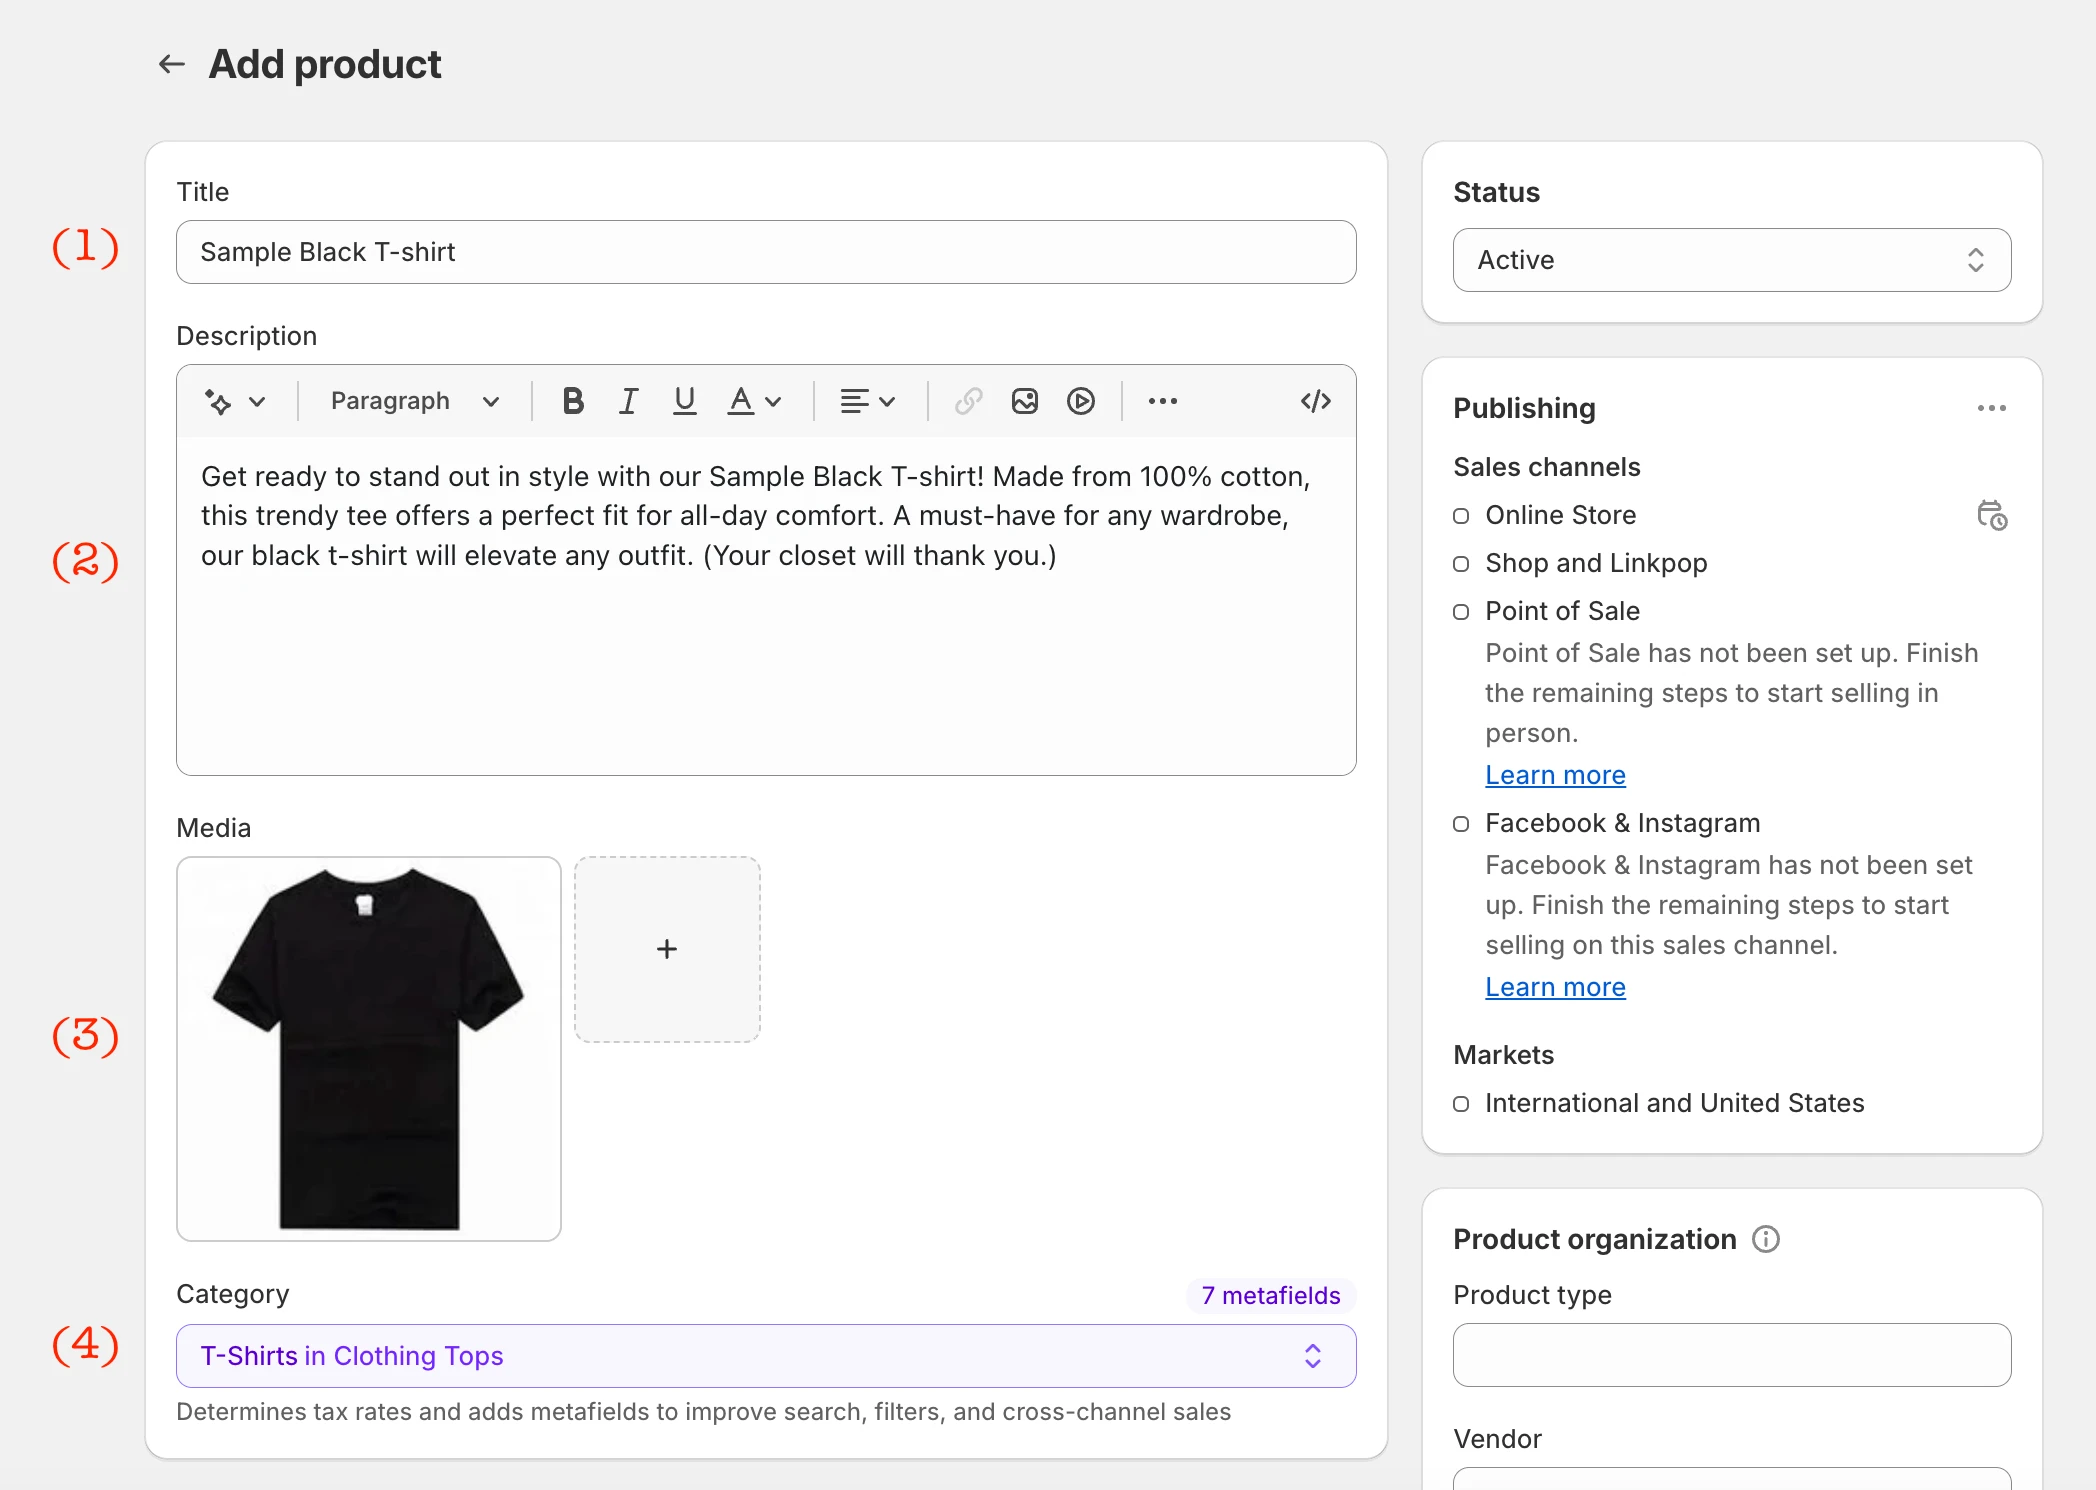
Step 3: Creating Product Organization
Categorize your products effectively for better navigation and searchability.
- Product Type: A broad category (e.g., "Shoes," "Jewelry").
- Vendor: Your brand name or the manufacturer/supplier.
- Product Category: Shopify provides predefined categories; type a keyword and select the best fit.
- Collections: Group products based on shared attributes (e.g., "Summer Collection," "Formal Wear"). A single product can belong to multiple collections.
- Tags: Keywords or labels for granular filtering (e.g., "Leather," "Casual").
Step 4: Uploading Product Images and Media
Visuals are critical for online sales.
-
High-Quality Images: Upload multiple images showcasing different angles and color options. Ensure they are high-resolution and clear.
-
Consistent Naming: Use dashes to separate words in image file names for better SEO.
-
Media Types: Shopify supports images, videos, and 3D models. For images, PNG is preferred, followed by JPEG. Videos can be up to 10 minutes and 1 GB, with 4K resolution recommended. 3D models should be in GLB or USDZ format.
-
Alt Text: Don't forget to add descriptive alt text to your images for accessibility and SEO.

Step 5: Pricing Your Products
Set your pricing strategy.
- Price: The final amount customers pay.
- Compare at price: The original price for discounted items. Setting "Price" at $49 and "Compare at price" at $99 displays a $50 discount.
- Cost per item: Track your product costs (manufacturer cost, labor, materials) for accurate profit analysis.
- Charge tax on this product: Select if applicable.
Step 6: Inventory Management
Keep track of your stock.
- Inventory will be stocked at: Choose your physical address or a third-party app.
- SKU (Stock Keeping Unit): A unique identifier for efficient stock organization.
- Barcode: Primarily for physical retail.
- Track quantity: Essential for monitoring stock levels and preventing overselling.
- Continue selling when out of stock: Use if you can swiftly restock.
- Quantity: Specify the number of units in stock.
Step 7: Shipping Details
Crucial for physical products.
- This is a physical product: Check if the item requires delivery.
- Weight: Specify accurate weight for correct shipping charges.
- Customs Information: For international sales, input Country/Region of origin and HS (Harmonized System) code.
- Shipping Costs: Consider incorporating shipping costs into your overall pricing. "66% of consumers expect free shipping, and about 70% abandon carts due to shipping fees."
Step 8: Product Variants
Offer variations like size, color, or material.
- Options: Add option names (e.g., "Size," "Color") and their respective values (e.g., "Small," "Medium," "Large").
- Variants Section: Once options are added, specify quantity and price for each variant if they differ.
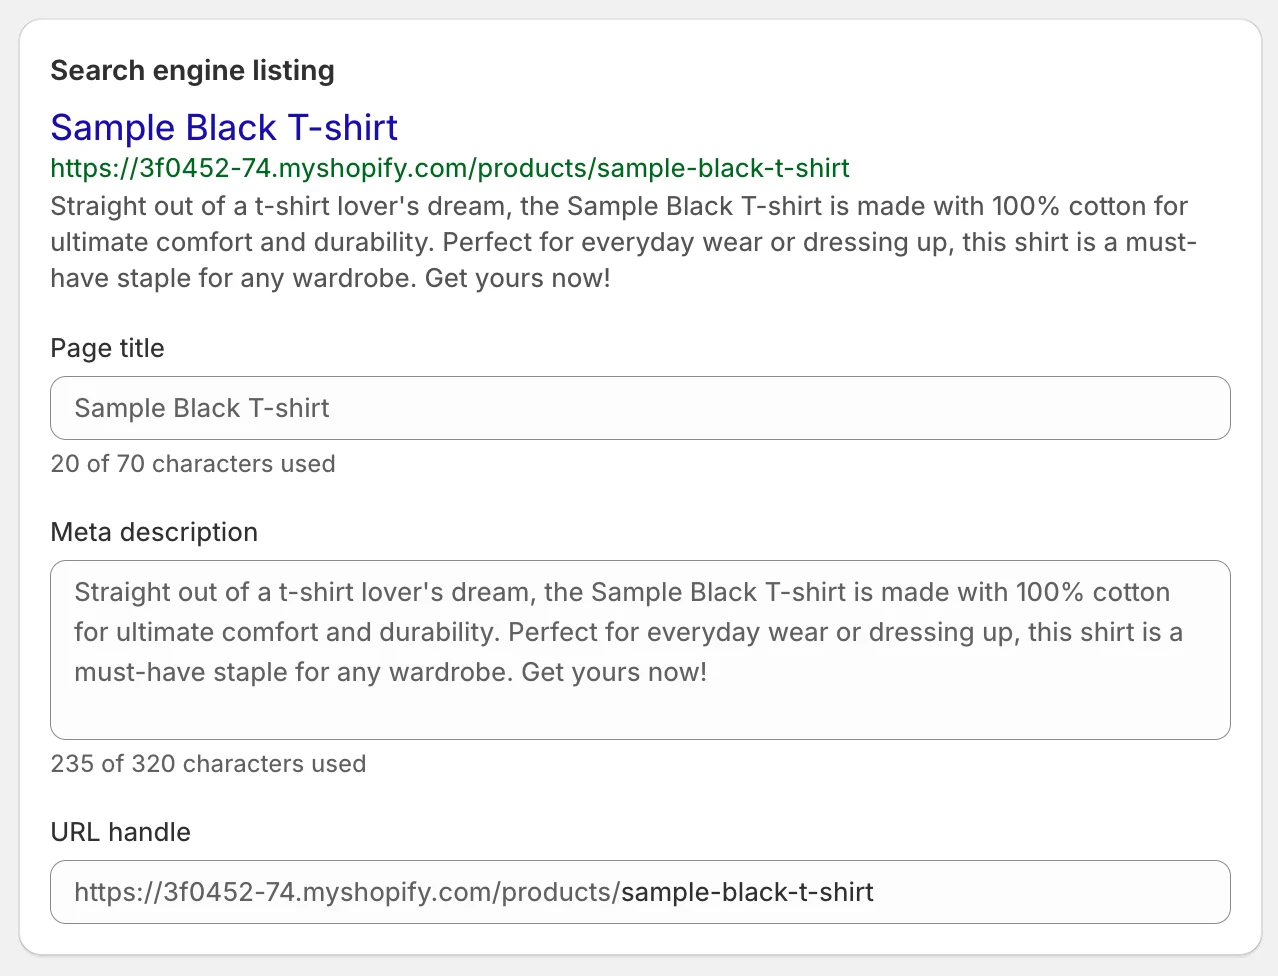
Step 9: SEO and Product Descriptions
Optimize for search engines.
-
Search Engine Listing Preview: This section shows how your product will appear in Google and Bing results.
-
Edit: Modify the title and description for SEO. Keep the product title under 70 characters and the description under 320 characters to ensure full display.
-
Keywords: Integrate relevant keywords naturally into your title and description.
Step 10: Publishing and Visibility
Make your product live.
- Review: Carefully review all details.
- Save product: Click to save your changes.
- Product Status: Set to "Active" to make it visible on your store or "Draft" to save it for later.
- Sales Channels: Choose where you want the product to be sold.
Other Methods to Add Products to Your Shopify Store
While manual entry is fundamental, Shopify offers several efficient alternatives for managing larger inventories or migrating from other platforms.
Duplicate Your Products
For similar products, duplicating saves significant time.
-
Navigate to Products in your Shopify admin.
-
Select the product you wish to duplicate.
-
Click Duplicate.
-
Adjust necessary details (title, images, variants) and click Duplicate product.
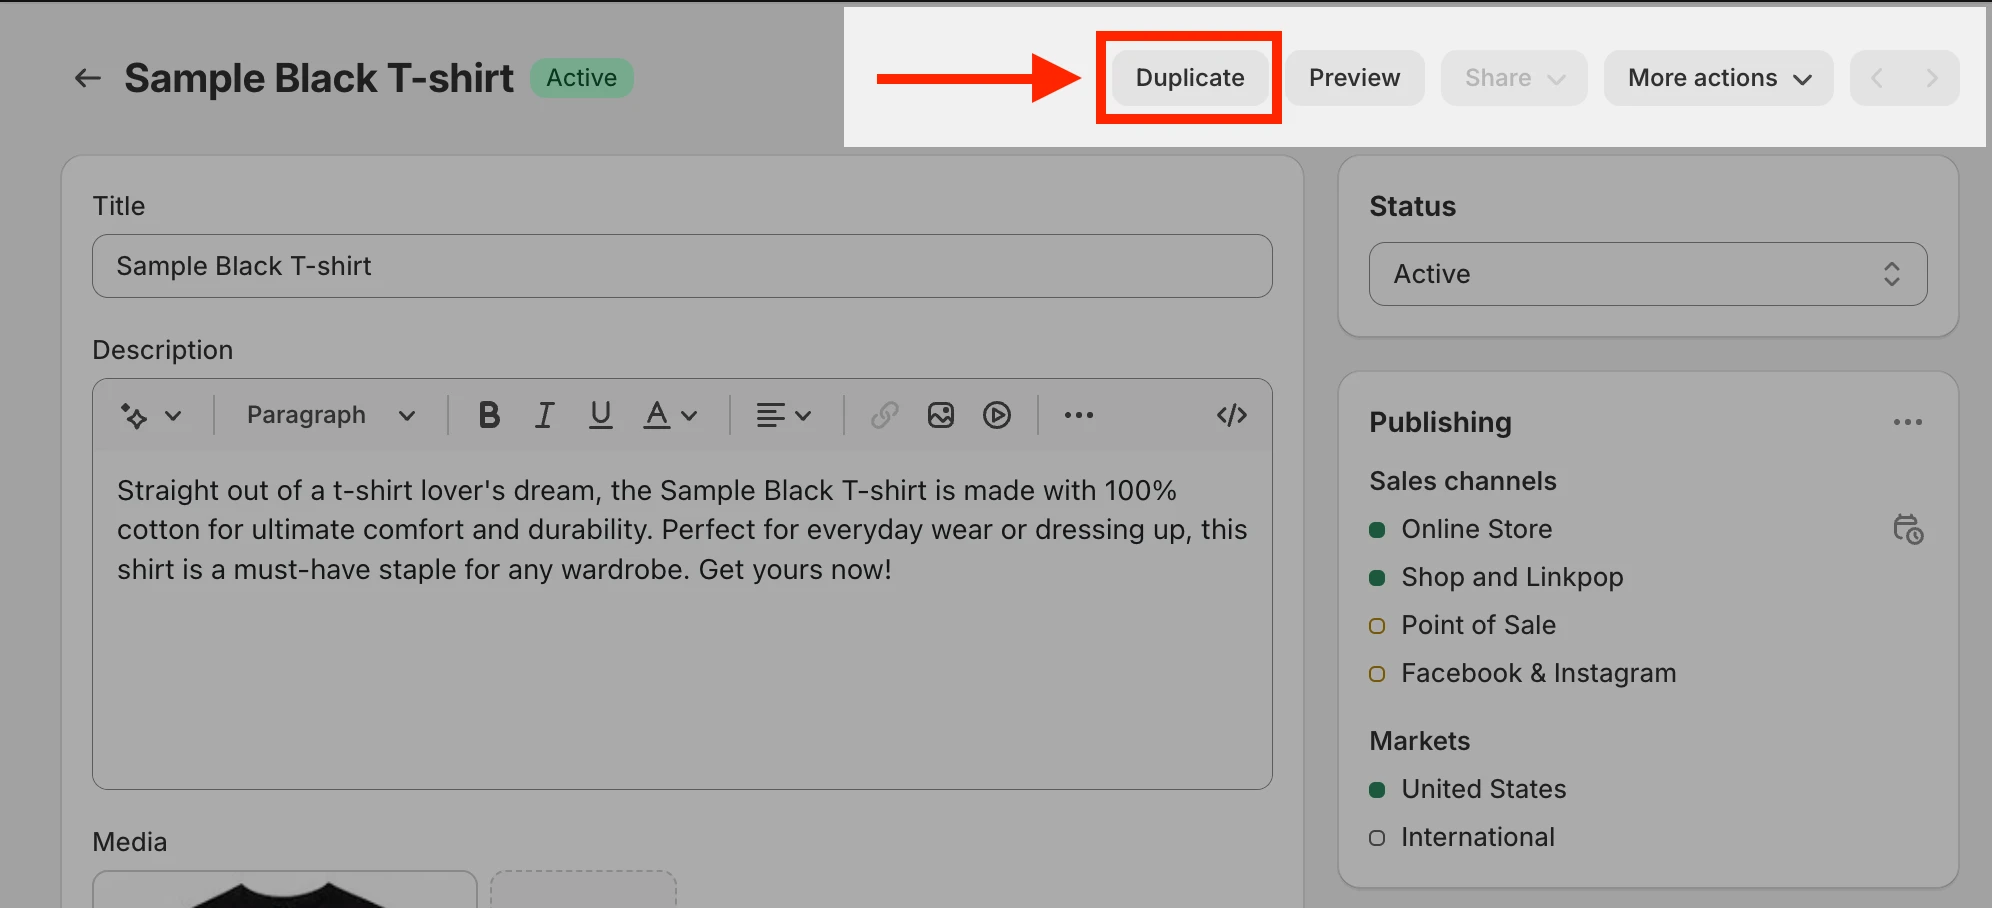 Image: Duplicating a product in Shopify.
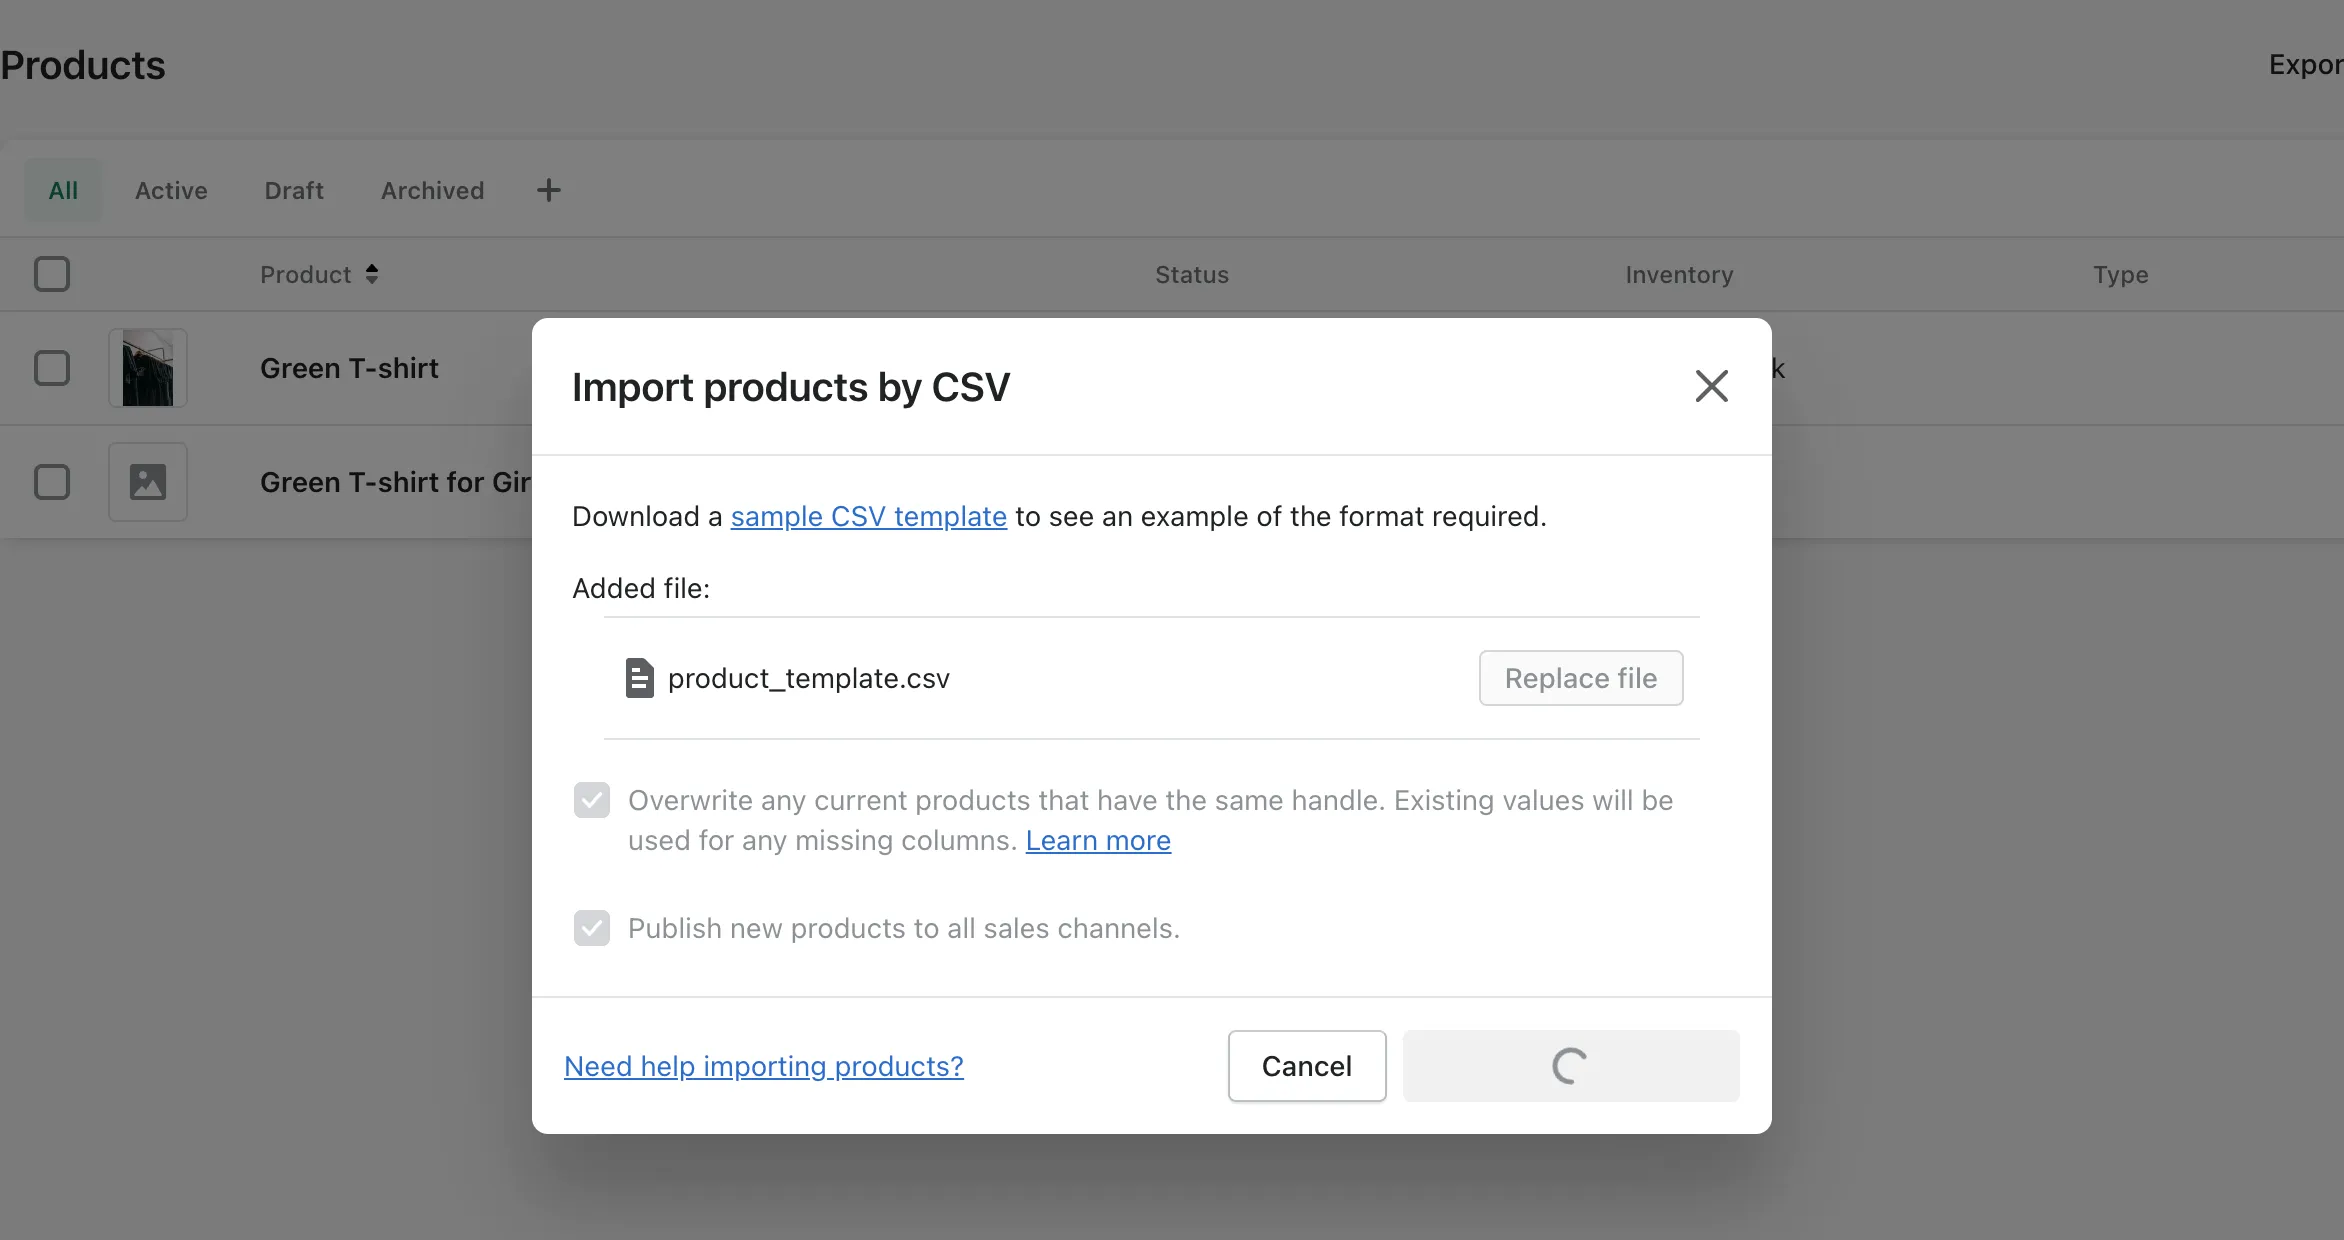
Adding Products from Other Websites (CSV Import)
Ideal for large volumes or platform migrations.
-
Prepare your product data in a CSV file, formatted according to Shopify's guidelines. Shopify provides a sample CSV template.
-
Go to Products > Import in your Shopify admin.
-
Click Add file and choose your CSV.
-
Click Upload and continue, review details, and then Import products.
Integrate New Products Using Shopify POS
For businesses with physical locations, Shopify POS streamlines inventory management across channels.
- On the Shopify POS checkout screen, press the + button.
- Select Add new product.
- Input product details (title, description, price).
- Include product photos.
- Save your changes.
Using Import Product Apps
For complex migrations or ongoing synchronization, dedicated apps offer powerful solutions.
- LitExtension Store Migration App: Specializes in seamless transfer of product data from over 140 e-commerce platforms, CSV, Excel, or database files. It offers a free demo for up to 200 entities and 24/7 support.
- Matrixify App: A robust solution for importing and managing extensive product data via Excel, Google Sheets, or CSV. It supports migration from platforms like Magento and WooCommerce, offers backup/restore, and automation features. Plans range from free demo to Enterprise ($200/month) for unlimited resources and 10x speed.
- Cart2Cart Store Migration App: Focuses on transferring vital store data, especially products, from diverse shopping carts to Shopify. It provides a live demo and emphasizes secure, precise migration.
Product Management in Shopify: Beyond Adding
Adding products is just the beginning. Effective product management ensures your inventory is accurate and your listings are always optimized.
Archive or Delete Products on Shopify
- Archive: Hides a product from your storefront but retains its data in your admin. Useful for seasonal items or temporarily unavailable products. Go to Products, select the product, scroll down, and click Archive.
- Delete: Permanently removes a product and its data. Only use if you're certain you won't need the product information again. Go to Products, select the product, scroll down, and click Delete.
Managing External Product Sources
Shopify allows integration with third-party applications to broaden your product offerings. Establish connections, import or synchronize products, and ensure regular updates for inventory, details, and images.
Effective Product Inventory Strategies
- Regular Audits: Ensure accuracy of product listings.
- Shopify's Integrated Tools: Utilize inventory tracking for automatic updates.
- Low-Stock Alerts: Replenish in-demand items to prevent stockouts.
- Categorization and Tagging: Organize products systematically using collections and tags.
- Reporting Tools: Analyze sales patterns and optimize stock levels.
Tips for Product Optimization and Visibility
To truly succeed, your products need to be seen and desired.
- Optimize Product Titles and Descriptions: Use relevant keywords, craft compelling narratives, and highlight benefits.
- Utilize High-Quality Images: Showcase products from different perspectives, enable zoom, and consider videos or 3D models for an immersive experience.
- Implement SEO Best Practices: Integrate keywords into titles, descriptions, and meta tags to improve search engine visibility.
- Leverage Product Variants: Provide options for size, color, etc., to cater to diverse preferences and improve user experience.
- Encourage Customer Reviews: Positive reviews build trust and influence purchasing decisions.
- Create Compelling Product Pages: Design visually appealing pages with all necessary details (pricing, specifications, availability). Tools like EComposer or GemPages can help you create stunning, high-converting product pages without coding.
- Implement Social Proof: Showcase testimonials, ratings, and user-generated content to build credibility.
Conclusion: Your Products, Your Success
Mastering how to add products to Shopify is a foundational skill for any online merchant. From the meticulous detail of manual entry to the efficiency of bulk imports and the power of app integrations, each method serves a unique purpose in building your e-commerce empire. Remember, your product listings are the digital face of your brand. Optimizing them with compelling descriptions, high-quality visuals, and strategic SEO is not just about listing items; it's about creating an experience that converts browsers into loyal customers.
Continuously monitor, update, and optimize your product pages to stay ahead in the dynamic e-commerce landscape. Tools like EComposer and GemPages offer incredible versatility to design diverse and high-converting product pages, ensuring your store stands out.
Ready to elevate your Shopify store? Start by applying these strategies to your product listings today.
CONTENTS
Related Posts
Gain insightful knowledge and invaluable experiences from dedicated experts.


Trusted by fast-growing brands