
How to Bulk Edit Products on Shopify: Bulk Editor, Bulk Actions and CSV
By Thomas Vu · Published
Shopify has three built-in ways to change many products at once. Bulk actions apply one change, like a tag or a collection, to every product you select. The bulk editor opens your products in a spreadsheet-style grid so you can change prices, SKUs and other fields row by row. CSV import handles thousands of products, or changes the editor can't calculate for you, such as cutting every price by 20%. Which one you use depends on how many products you're changing and whether each one gets the same value.
This tutorial walks through all three in the Shopify admin, using Shopify's own Help Center documentation, plus the inventory version of the bulk editor and the CSV mistakes that can delete your variants. If you're getting ready for Black Friday on November 27, it's also the fastest way to set sale prices across your catalog.
Key takeaways
- Same change for every product? Use a bulk action. Add or remove tags, add products to a collection, publish or unpublish them, or delete them, all from the Products list.
- Different values per product? Use the bulk editor. Select products, click Bulk edit, add the columns you need and edit them like a spreadsheet.
- Products with variants: edit stock from the Inventory page. Shopify only lets you bulk edit inventory for multi-variant products there, and the editor sets exact quantities without an audit trail.
- Thousands of products or a percentage change? Use CSV. Export, edit in Google Sheets, then import with Overwrite products with matching handles ticked.
- Back up first. A CSV import can't be cancelled once it starts, and blank cells overwrite your existing data.
Which Shopify bulk editing tool should you use?
Pick the tool by the shape of the change, not just the number of products.
You want to | Use | Where in the admin |
|---|---|---|
Add the same tag, collection or sales channel to many products | Bulk actions | Products, select products, then the action buttons or the ... menu |
Change prices, compare-at prices, SKUs, vendors or other fields product by product | Bulk editor | Products, select products, Bulk edit |
Set stock quantities across variants and locations | Inventory bulk editor | Products > Inventory, select variants, Edit variants |
Change thousands of products, or apply a formula like "20% off" | CSV export and import | Products > Export, then Products > Import |
Run the same multi-step change regularly | Shopify Flow workflow | Products, select products, Run an automated workflow |
Sources: Shopify Help Center pages on bulk actions, the bulk editor and inventory bulk editing.
Shopify also says the more you change at once, the longer the change takes, and points to CSV files for larger jobs (Shopify Help Center). One browser note from the same page: Microsoft Edge can cause bulk editing errors because of its URL length limit, so use Chrome, Firefox or Safari.
How to use bulk actions on Shopify products
Bulk actions are the quickest option when every selected product gets the same change.
- In your Shopify admin, go to Products.
- Filter the list so it shows only the products you want, for example by vendor, product type, tag or collection.
- Select products with their checkboxes. To select a range, click one product, hold Shift and click another.
- To select everything, click the checkbox at the top of the list, then Select all 50+ items. In a filtered view with more than 50 products, open the 50 selected dropdown and click Select all results instead.
- Pick the action. Bulk edit and Set as draft appear right above the list, and the ... menu next to them holds the rest.
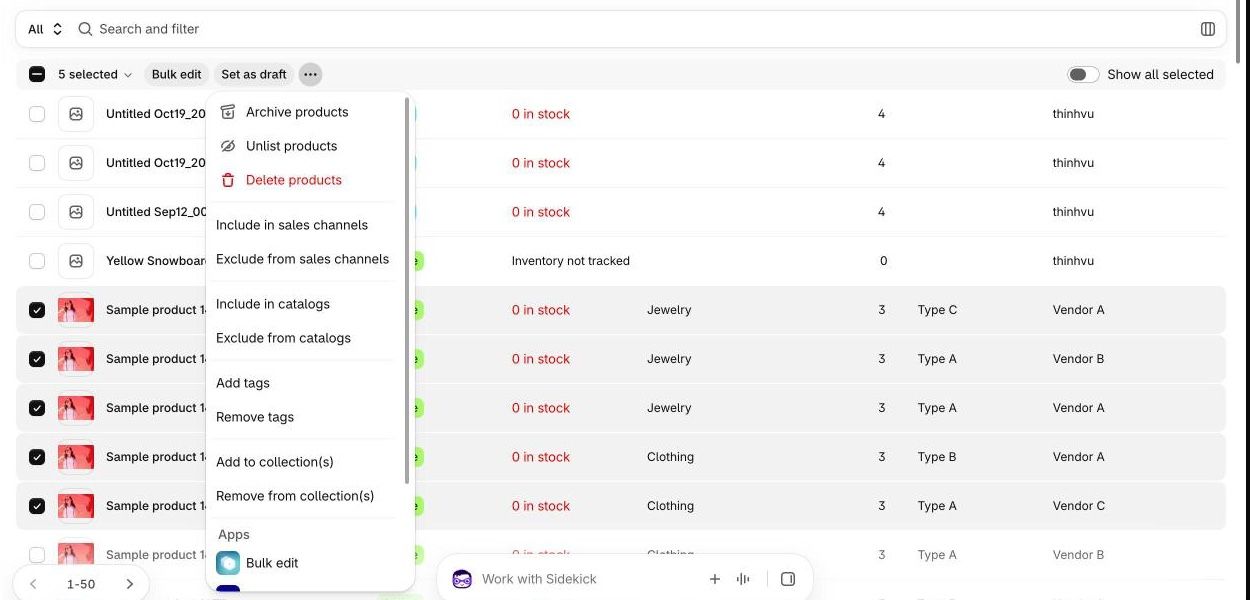
In the Shopify admin today, the ... menu offers:
- Archive products, Unlist products and Delete products. Deleting asks you to confirm.
- Include in sales channels and Exclude from sales channels
- Include in catalogs and Exclude from catalogs
- Add tags and Remove tags
- Add to collection(s) and Remove from collection(s)
- Actions from apps you've installed, listed under Apps, and Run an automated workflow if you use Shopify Flow
Shopify's Help Center still lists a few of these under older names, such as Make products available, so the labels in your admin may differ slightly from its documentation (Shopify Help Center).
Tags are worth the extra minute. A tag like bfcm-2026 on every product in a sale lets you filter, bulk edit and remove that group later in two clicks. Adding products to a collection works the same way, and our guide to adding products to a featured collection covers the manual and automated options in more detail.
On the Shopify mobile app you can run most product bulk actions too, but you can select at most 25 items at a time.
How to use the Shopify bulk editor, step by step
The bulk editor is a grid: each row is a product or variant, and each column is a property such as price, SKU or compare-at price.
Step 1: Select the products
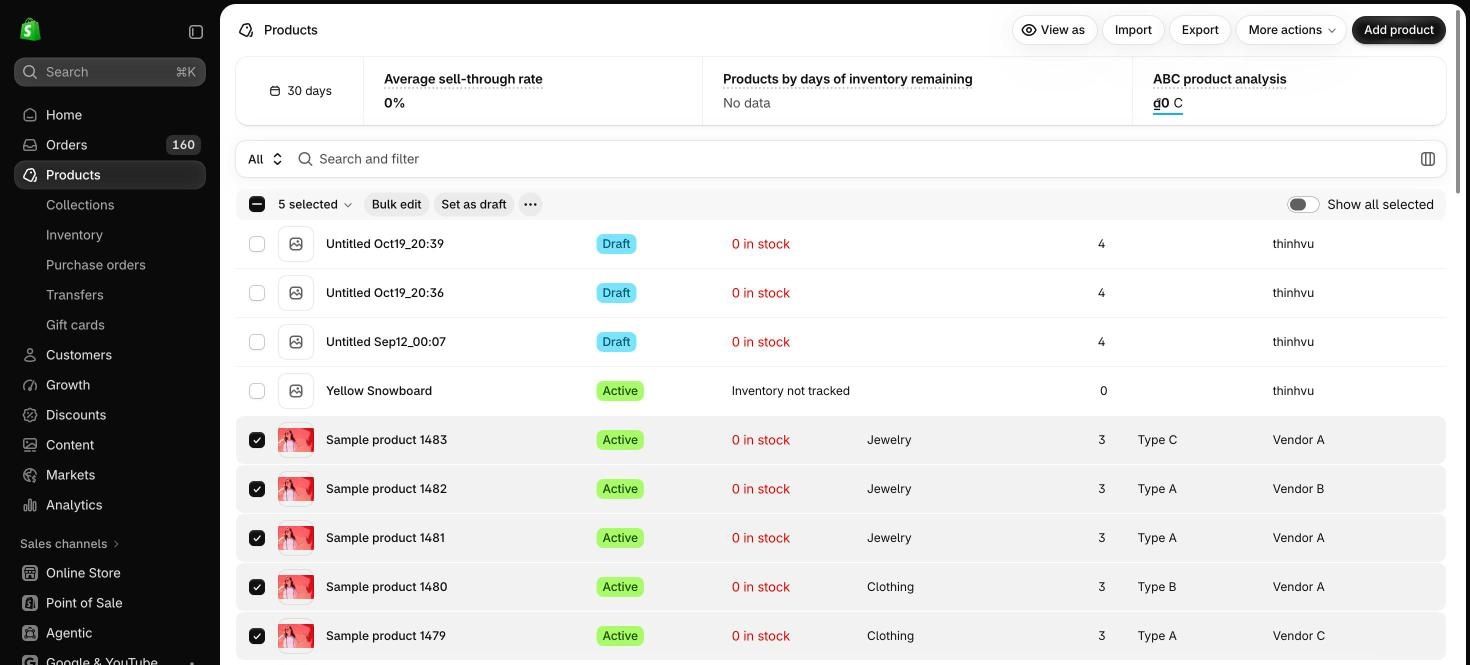
Go to Products, filter the list and select the products you want to change. A bar appears above the list showing how many products you've selected. Click Bulk edit. The same button works from Collections and Customers if you need to edit those in bulk.
Step 2: Choose your columns
The editor opens with a few columns already showing, such as Status, Product category, Vendor and the price. Click Columns and tick every property you plan to edit, such as Tags, Product type, Compare-at price, SKU or a product metafield. The menu groups the fields under headings like General and Publishing, and the Search fields box finds one quickly. Untick the ones you don't need so the grid stays readable.
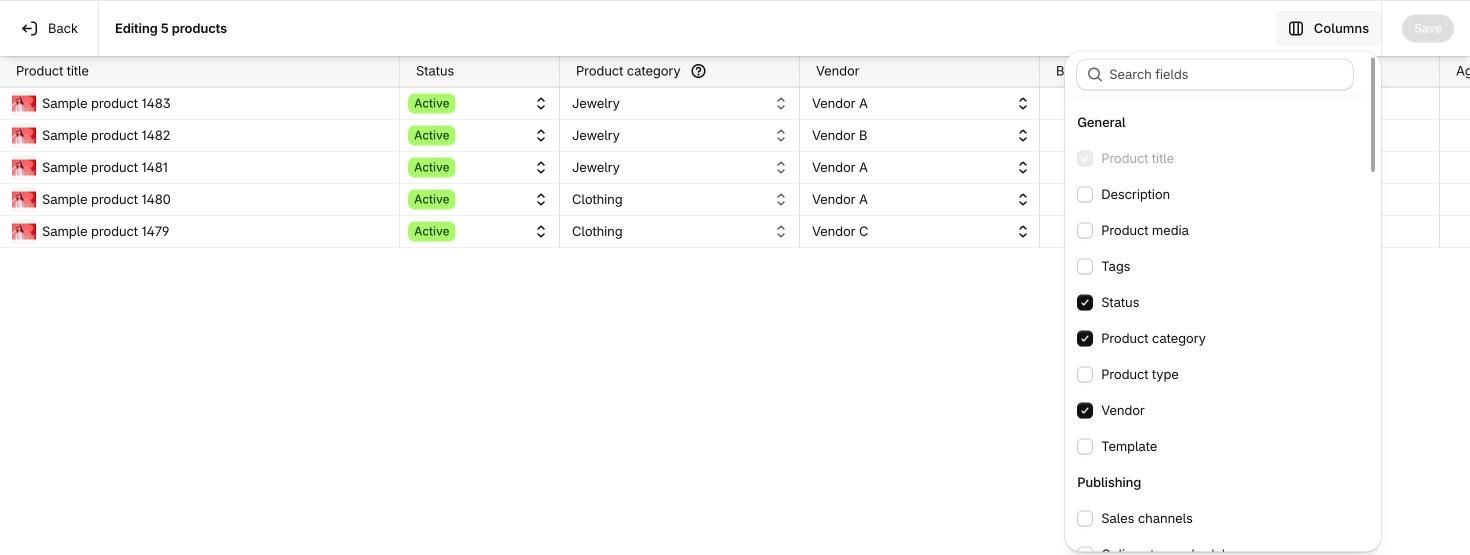
The price column may be labelled Base price, as it is in our store.
Step 3: Edit the cells
Click a cell and type. The real speed comes from editing many cells at once: select several cells, type the new value into the outlined active cell, and every selected cell updates.

To do this | Do this |
|---|---|
Move between cells | Click a cell, then use the arrow keys |
Select a block of cells | Click a cell, hold Shift, click the last cell |
Select cells that aren't next to each other | Hold Alt (PC) or Command (Mac) and click each cell |
Edit many cells at once | Click and drag across them, then type, tick a checkbox or pick from a dropdown |
Copy a value up or down a column | Drag the cell's fill handle over the cells above or below |
Widen a column | Drag the divider to the right of its title |
Source: Shopify Help Center.
Step 4: Save, and fix any errors
Click Save. If Shopify shows "Update the invalid values, then save again", at least one row has a value it won't accept, and it can be in a column you haven't added to the grid. Shopify says the usual causes are a variant missing a required SKU or a metafield validation error. Add the SKU and metafield columns, find the bad value, fix it and save again (Shopify Help Center).
Example: setting up sale prices
Say you're putting 40 t-shirts on sale for Black Friday, from $40 down to $32.
- Filter Products by the product type or tag, select all the t-shirts and click Bulk edit.
- Add the Compare-at price column.
- Drag down the Compare-at price column, type
40, and every selected cell becomes $40. This is the crossed-out price shoppers see. - Drag down the Price (or Base price) column, type
32, and save.
When the sale ends, clear the compare-at prices and set the prices back the same way. Our Shopify BFCM preparation guide covers the discount math and the rest of the week-by-week prep.
This works because every product has the same price. If your products have different prices and you want 20% off each, the bulk editor can't calculate that for you: Shopify's documentation describes typing values and dragging them down, not formulas. That's a job for the CSV method below.
How to bulk edit variants and inventory
Inventory has its own version of the bulk editor, and it behaves differently from the products one.
When a product has more than one variant, Shopify only lets you bulk edit its inventory from the Inventory section (Shopify Help Center). There are two ways in:
- One product: open the product, select variants in the Variants section and click Open bulk editor.
- Many products: go to Products > Inventory, optionally pick one location, select the variants and click Edit variants.
Besides quantities, the inventory bulk editor lets you edit each variant's price, compare-at price, cost per item, SKU, barcode, weight, HS code, country of origin, whether it's taxed, whether it needs shipping, whether quantity is tracked and Continue selling when out of stock (Shopify Help Center). Variants that don't track quantity don't appear on the Inventory page at all, so turn on tracking first if one is missing.
Three things catch people out:
- It sets exact quantities. If a variant has 100 units and you type 150, it becomes exactly 150. Shopify notes this doesn't record where stock came from or went, so use the Inventory page or product page when you need an audit trail.
- It protects you from sales during your edit. If stock changes while the editor is open, Shopify shows an Inventory mismatch dialog when you save. Say you changed 100 to 150, but a sale has since dropped it to 95. Save suggested applies your +50 to give 145, Save original forces 150, and Discard takes you back to the editor.
- Variants don't stay grouped. The editor keeps the sort order of the Inventory page, which defaults to quantity, so variants of one product can end up far apart. Sort the Inventory list the way you want before you click Edit variants.
The Inventory page also has bulk actions for Continue selling when sold out and Stop selling when sold out. Turning on continue selling across many products is a quick way to take pre-orders, but sold-out products still appear wherever they sit in your collections. If the real problem is sold-out products crowding the top of your collections, Redsun: Out of Stock Manager moves them to the bottom automatically and back up when they're restocked. Our post on what to do with out-of-stock products explains when to keep, hide or redirect them.
How to bulk edit products with a CSV file
CSV is the right tool for large catalogs and for any change you'd normally do with a spreadsheet formula. It's also the easiest way to break your products, so follow the steps in order.
Step 1: Export only what you need
- Go to Products and filter the list down to the products you're changing.
- Click Export and choose Products that match your search and filters. You can also export the current page, selected products or all products.
- Choose CSV file for Excel, Numbers, or another spreadsheet program, then click Export products.
Exports of all products or filtered results arrive by email. Current-page and selected-product exports download straight away, unless one of the products has more than 100 variants. Very large exports can time out, and Shopify's fix is to filter and export in smaller batches (Shopify Help Center).
Before you change anything, also export All products and keep that file somewhere safe. Shopify recommends having a backup before you import, and it's the only way back if something goes wrong.
Step 2: Edit the file in Google Sheets
Open the export in Google Sheets, which saves CSV files in the UTF-8 encoding Shopify needs. Other spreadsheet programs may need an extra step to save in UTF-8, or accented characters and curly quotes can turn into strange symbols.
To cut every price by 20%, add a helper column next to Price with a formula like =ROUND(H2*0.8,2), where H is your Price column. Fill it down, copy the results, paste them back into Price as values only, then delete the helper column. If you want shoppers to see the old price crossed out, copy the old prices into Compare-at price first.
Keep these rules from Shopify's CSV documentation in mind while you edit (Shopify Help Center):
- Keep the URL handle and Title columns. They're the only required columns for an update, and the handle is how Shopify matches each row to an existing product.
- Keep Option1 name and Option1 value when you edit variant columns. Price, SKU and weight are variant data. If those option columns are missing, Shopify creates a new default variant and deletes the existing ones.
- Delete columns you aren't changing. A column that isn't in the file leaves the product untouched. A column that's in the file but blank overwrites the product's value with blank.
- Don't sort the rows. Sorting can split variants and image URLs from their products, and importing a sorted file can overwrite products with bad data that can't be recovered.
- Don't edit option values unless you mean to. Changing Option1, Option2 or Option3 values deletes the variant IDs and creates new ones, which can break apps that rely on them.
Step 3: Import with overwrite turned on
- Go to Products and click Import.
- Click Add file and choose your CSV. The file can't be larger than 15 MB, so split bigger files.
- Tick Overwrite products with matching handles. Without it, Shopify ignores rows whose handle already exists, so nothing changes.
- Click Upload and continue, check the preview, then click Import products.
Shopify sends you a confirmation email once the file is uploaded. An import can't be cancelled once it starts, and Shopify doesn't keep a history of past imports, so check your store's activity log and spot-check a few products afterwards (Shopify Help Center).
Two limits to know: a CSV file can't delete products or change their availability on other sales channels, so use bulk actions for those. And CSV supports product metafields but not variant metafields, which you can only bulk edit in the variant bulk editor. If you're adding new products rather than editing existing ones, our guide to adding products to Shopify covers CSV imports from scratch.
What about Shopify Flow and Sidekick?
The three built-in tools cover most stores, but two other Shopify features are worth knowing.
Shopify Flow shows up as Run an automated workflow in the product bulk actions. It runs a workflow on the products you've selected, which suits multi-step changes you repeat, like tagging a group of products and adding them to a collection in one go.
Sidekick, the AI assistant in your Shopify admin, can create and edit products from a plain-language request, and it shows its changes for you to review before they're applied (Shopify Help Center). Shopify's help pages don't describe it as a replacement for the bulk editor, so check each change it proposes as carefully as you'd check your own.
Bulk edit apps worth trying from the Shopify App Store
If you only run a sale twice a year, the bulk editor and a CSV file are enough. If you edit products every week, an app saves you the CSV round trip and adds what Shopify's own tools don't have: a preview before you save, a way to undo an edit, and changes that start and end on a schedule.
These three bulk editors each have more than 900 reviews and a 4.9 out of 5 rating, and each has a free plan you can test on 10 products. Ratings, review counts and prices are from their Shopify App Store listings on October 13, 2026, so check the listing for current prices. We don't make or sell any of them.
App | Rating | Free plan | Paid plans start at | Best for |
|---|---|---|---|---|
4.9 (928 reviews) | 10 products | $30/month, no product limit | Previews, one-click undo and scheduled sale prices | |
4.9 (1,162 reviews) | 10 products per task | $9.99/month, 500 products per task | Low-cost bulk edits you can revert | |
4.9 (1,771 reviews) | 10 items per file | $20/month, 5,000 products per file | Spreadsheet imports, exports, migrations and backups |
Ablestar Bulk Product Editor
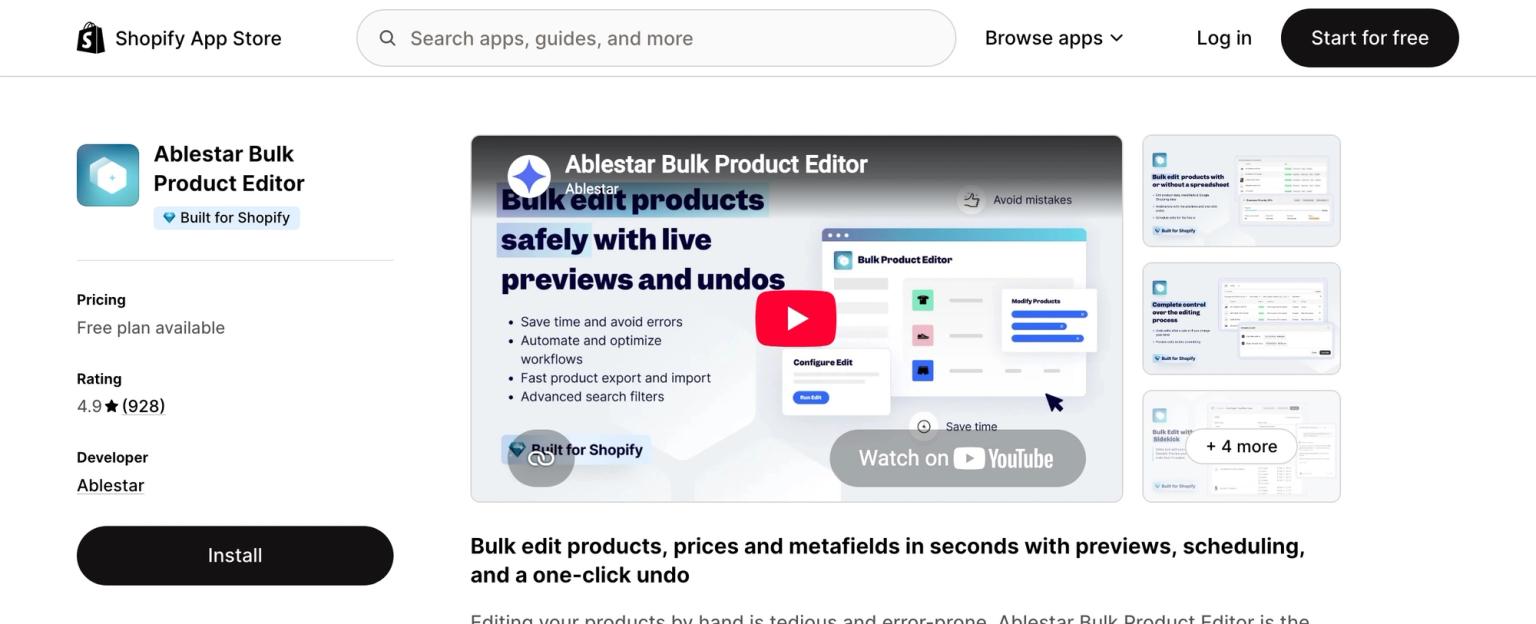
Ablestar works like a safer version of Shopify's bulk editor. You pick the products and the fields to change, preview the result, and then run the edit. Every edit can be undone with one click, which the listing points out is handy for putting prices back after a sale. It edits products, variants, prices, SKUs, tags, descriptions, inventory, metafields and Google Shopping data, and it can apply a spreadsheet you upload without reformatting it first.
The free Starter plan is limited to 10 products. Basic, at $30 a month, removes the product limit and adds scheduled edits, so a Black Friday sale can start and end without you. Basic also includes one inventory sync from Google Drive, Dropbox, FTP or a URL, and higher plans add recurring edits and more syncs. It has Shopify's Built for Shopify badge and, according to the listing, works with Sidekick (Shopify App Store).
Hextom: Bulk Product Edit
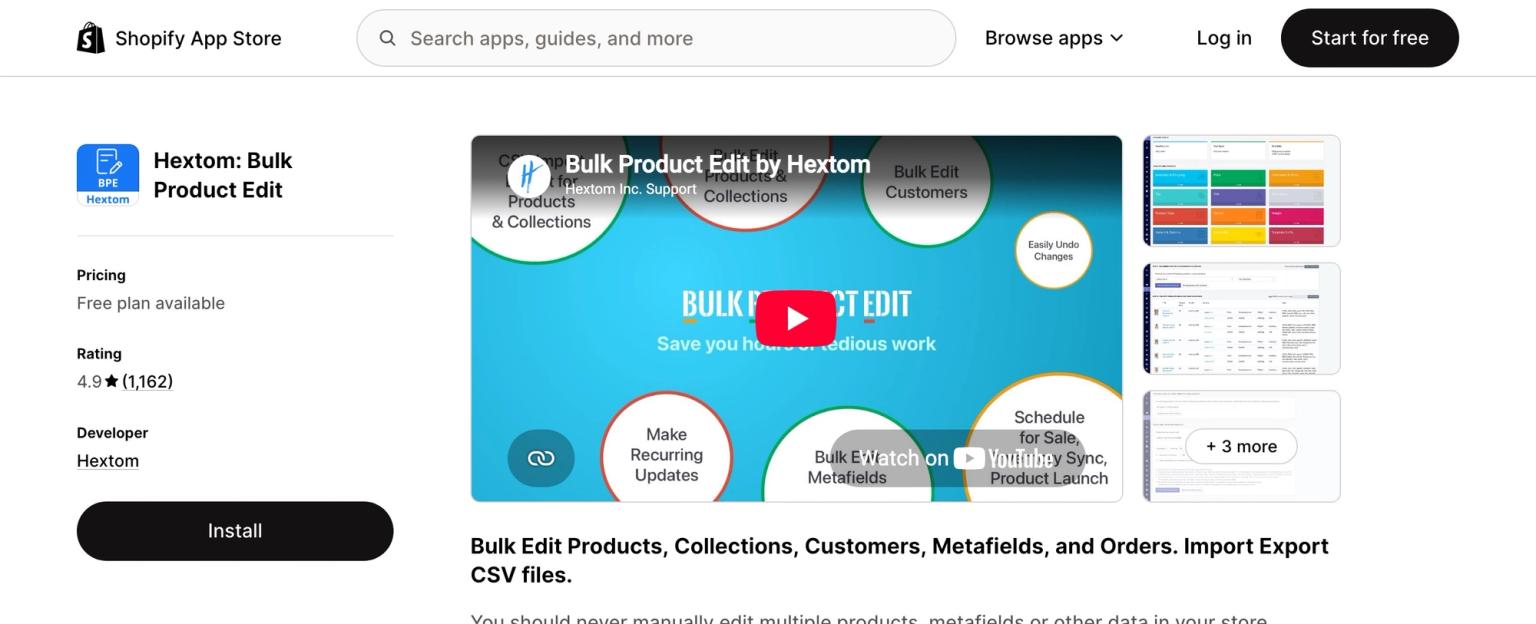
Hextom is the cheapest of the three for revertible edits on a mid-sized catalog. You filter your products, choose the change and run it, and the app backs up everything it changes so you can revert any edit later. Besides products, it bulk edits collections, customers, orders and metafields, and it can import and export CSV files.
The free Demo plan covers 10 products per task. Basic costs $9.99 a month for 500 products per task with a 60-day backup, and Professional costs $19.99 a month for 5,000 products per task and up to 10 scheduled tasks (Shopify App Store).
Matrixify: Data Export Import
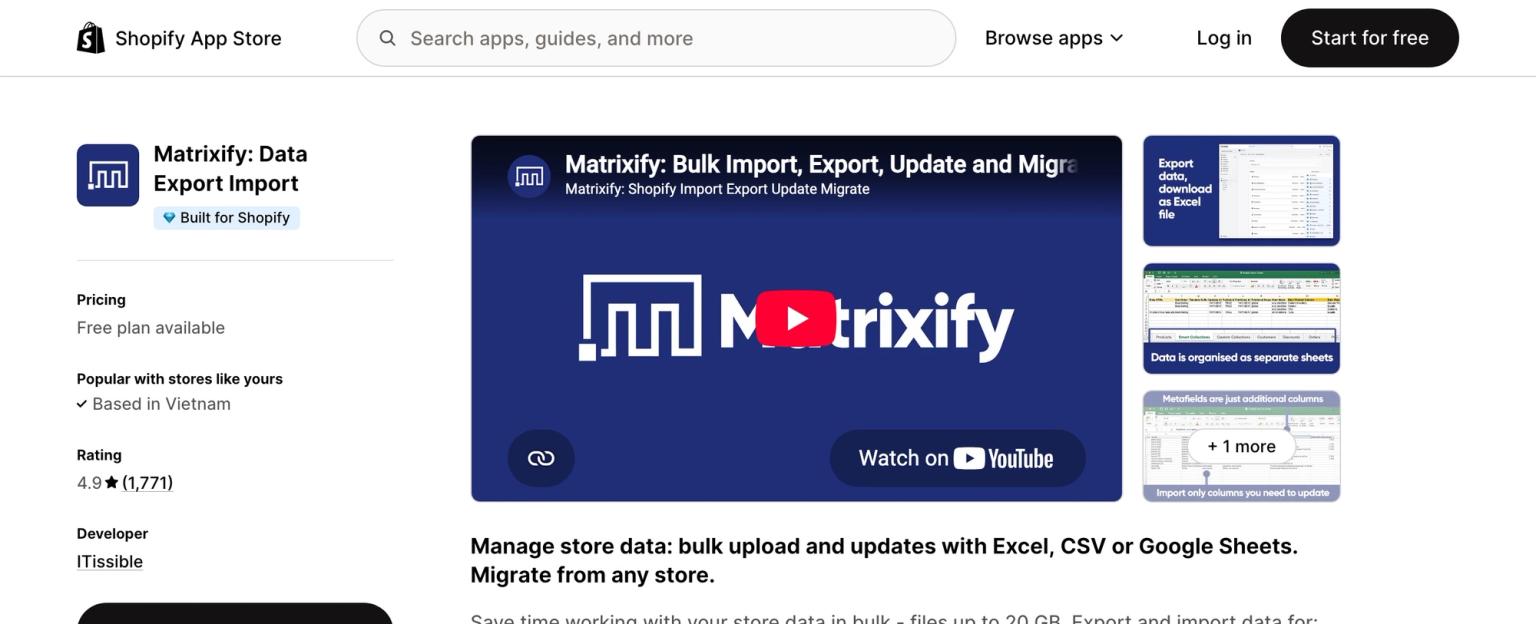
Matrixify is the CSV method on a much bigger scale. It exports and imports Excel, CSV or Google Sheets files of up to 20 GB, and covers far more than products: collections, customers, orders, discounts, pages, blog posts, redirects, metafields, metaobjects, menus and translations. It can run scheduled and repeating jobs, back up and copy data between stores, and migrate a store from Magento, WooCommerce, BigCommerce, Lightspeed or WordPress.
That range is why Shopify's own Help Center points to Matrixify for bulk editing blog posts and pages, which the built-in bulk editor no longer supports (Shopify Help Center). The free Demo plan handles 10 items per file, and Basic costs $20 a month for 5,000 products per file (Shopify App Store).
Which bulk edit app should you pick?
- You want to click, preview and undo: Ablestar.
- You want revertible edits at the lowest monthly price: Hextom.
- You already work in spreadsheets, or need to edit more than products: Matrixify.
Whichever you choose, try it on the free plan with 10 products before you pay, and run your first real edit on five products. Check them on your storefront, then do the rest.
Shopify bulk editing: FAQ
How do I bulk edit prices in Shopify?
Select the products in Products, click Bulk edit and add the Price and Compare-at price columns. To give many products the same price, drag across the cells and type the new value once. To change prices by a percentage, export a CSV, calculate the new prices with a spreadsheet formula and import the file with Overwrite products with matching handles ticked.
How many products can I bulk edit at once?
On desktop, you can select every product in your store with Select all 50+ items, or every product in a filtered view with Select all results. On the Shopify mobile app, the limit is 25 items at a time. Shopify says bigger changes take longer and recommends CSV files for large volumes. A product CSV can be up to 15 MB.
Can I undo a bulk edit in Shopify?
Shopify's help pages don't describe an undo for a saved bulk edit, and a CSV import can't be cancelled once it starts. Export a full product CSV before any large change. If something goes wrong, check the activity log to see what changed, then fix it in the bulk editor or by importing your backup.
Why won't the Shopify bulk editor save?
The "Update the invalid values, then save again" message means at least one product or variant has a value Shopify won't accept, even in a column you can't see. Usually it's a variant missing a required SKU or a metafield value that fails validation. Add the SKU and metafield columns to find it.
Can I bulk edit variants in Shopify?
Yes. For prices, SKUs and other variant details, use the bulk editor from Products or from a product's Variants section. For stock, use Products > Inventory, select the variants and click Edit variants, because Shopify only lets you bulk edit inventory for multi-variant products from there.
What is the best bulk edit app for Shopify?
It depends on how you like to work. Ablestar Bulk Product Editor suits merchants who want a preview and a one-click undo, Hextom: Bulk Product Edit is the cheapest of the well-reviewed options for revertible edits, and Matrixify suits anyone who prefers spreadsheets or needs to bulk edit more than products. All three are rated 4.9 out of 5 on the Shopify App Store and have free plans for 10 products.